Getting Started with MySQL

Seven years ago, I had written about my experience of Taming Sakila and since then I’ve had the pleasure and privilege of discussing the world’s most popular open source Database in Oracle University classrooms for some years. While those sweet memories remain, I was a bit restless for ignoring requests from a few of my friends in helping them learn the basics of MySQL. And today, I’m happy to have been able to produce some screen-casts on helping my friends (and all those interested) get started with the MySQL Database. Over a dozen videos that are on the YouTube playlist ‘Getting Started with MySQL’ – embedded below- might just be sufficient to start learning MySQL. For a more detailed study, I’d stronly recommend the training programs on MySQL or the official MySQL documentation.


I hope some of you find these videos useful.

Scripted SQL Connector in ForgeRock OpenIDM 4

ForgeRock Identity Management solution includes generic Groovy Connector Toolkit that enables you to run Groovy scripts on any external resource. You can read more about it here. Lifted verbatim from the OpenIDM 4 documentation mentioned above:”To facilitate creating your own scripted connectors with the Groovy Connector Toolkit, OpenIDM provides a scripted connector bundler. ” I followed Instructions in there (as well as in the README file of the ‘sample3’ in OpenIDM installation directory), to build a ScriptedSQL Connector to connect OpenIDM to a MySQL Database and my Video Log is below:

Enjoy!

Deploying a Highly Available ForgeRock Identity Management Solution

We have already discussed on this space the installation of ForgeRock Identity Management Solution and further configuring a Database as its repository. But in those discussions, all the critical components of the Solution namely the ForgeRock OpenIDM 4, MySQL Database were a Single Point of Failure. In an environment where business continuity is critical, we ought to build a solution that has no SPOF in the architecture. So I’m going to take you through that route today. Of course, this is a hint and just a way to understand the different options that you might consider in Configuring ForgeRock OpenIDM 4 for High Availability.

I’ve a rather simple example of HA configuration, mainly meant for understanding and learning it. In a sensitive infrastructure, a great deal of planning goes into building a Highly Available Environment. So what’s the small little setup we’ve here for learning:

ForgeRock OpenIDM 4 High Available Configuration

Two instances of ForgeRock OpenIDM 4 connects to a MySQL Proxy, which in turn talks to a MySQL Replication site. Of course, in this setup, MySQL Proxy is a SPOF, so you should have at least two of it in front of the MySQL Replication site. But if I had attempted to it, the whole thing would have looked a lot more complicated and would have failed the objective of being a learning tool. So if you’ve just under a half an hour to spare, you will know:

– How to use MySQL Proxy
– How to setup MySQL Replication (Master/Slave)
– How to install OpenIDM 4
– How to configure OpenIDM 4 to use a MySQL Database as its Repository
– How to bring up an OpenIDM Cluster environment

Well, the final state is what you get to see in the illustrations above.

Now on to the video. Enjoy!

ForgeRock OpenIDM 4: Installing a Repository for Production (MySQL)

Think of this post as a remake of an earlier one done several months back. Well, just tha, the earlier blog post in reference here was based on a now older version of OpenIDM, ForgeRock‘s Identity Management Solution. As always, I’m grateful to the ForgeRock documentation team for a clean write up on the Configuration of MySQL as a repository for ForgeRock OpenIDM 4.

Related Video/Documentation:
Video – Setting Up ForgeRock OpenIDM with MySQL (OpenIDM 3.x)
Documentation – Setting up OpenIDM with MySQL

MySQL Database as Identity Repository for ForgeRock OpenAM

ForgeRock OpenAM has three types of repositories:

(i) Configuration Repository that stores the OpenAM configuration data (ForgeRock OpenDJ)
(ii) Authentication Repository that’s used by OpenAM to Perform User Authentication (has more than 20 options out of the box)
(iii) Identity Repository that stores the User Profiles (has several options like LDAP v3, OpenDJ, AD, IBM’s Directory Server and Database [Eary Access])

Someone asked me the details on configuring a Database as the Identity Repository for ForgeRock OpenAM, so as soon as I got a chance, created the following screen-cast to demonstrate the use of MySQL Database as an Identity Repository for ForgeRock OpenAM. It’s fairly straightforward.

Enjoy!

ForgeRock OpenIDM: Setting Up SSL With MySQL Internal Repository

If you’ve already seen the video demonstration on setting up ForgeRock OpenIDM to use a JDBC repository, you may now be interested to know how to secure the traffic from ForgeRock OpenIDM to its JDBC repository. So in the video that follows, you will see:

– Setting up SSL in MySQL database
– Configuring OpenIDM to use SSLto the MySQL database (its internal repository)
Like several other videos that I’ve already published on this blog space around ForgeRock products, this one also makes use of Ubuntu 14.10 host 0S. A Linux Container running Ubuntu 14.04.2 LTS is where we’ve our ForgeRock OpenIDM and MySQL database running. The illustration below might help you get a quick picture about the infrastructure used for the screen-cast:

OpenIDMwithSSLtoJDBC-01
Hope you’ll find the video log useful:

Thanks
MySQL Product Documentation
ForgeRock Documentation

Configuring Database as OpenAM Log Type

That the ForgeRock OpenAM audit logs are extremely important is an understatement. By default, OpenAM uses flat files as log output format, but there does exist an option to configure OpenAM to generate audit logs onto a database. And when a friend today raised a question around it, I thought I should make a screen-cast on it, which is what you would find embedded below.

A bit about the system used for the screen-cast. I’m running two Linux Containers (Ubuntu 14.04.2 LTS), one of which has OpenAM installed & configured and the other container running an instance of MySQL database. Rest of the story should be straightforward in the video.

Special Thanks: David Goldsmith

Configuring ForgeRock OpenIDM In a Cluster

On this site, I’ve written another couple of posts around ForgeRock OpenIDM. If you’re not familiar with OpenIDM, I’d recommend reading/watching those (mentioned below), before viewing the video log embedded at the end of this post.

ForgeRock OpenIDM Installation In a Linux Container
Forge Rock OpenIDM with MySQL

Video logs on the links above are quite detailed, but if you’ve not much time to spare to watch all of it, not to worry, the installation of OpenIDM and configuration of MySQL as its internal repository is quickly covered in the following screen-cast as well.

The below illustration might give you a rough idea about the infrastructure that I used to perform the demonstration on OpenIDM Cluster Configuration. I’ve a Host Operating System of Ubuntu 14.10 in which there are many Linux Containers. Two of LXCs named ‘my-openidm’ & ‘my-openidm2’ are used to install two separate instances of ForgeRock OpenIDM (say ‘node1’ & ‘node2’). A directory named ‘/software’ on the Host OS that has all required binaries is shared as ‘/source’ inside the Linux Containers. For brevity, I’ve included only the relevant LXCs in the illustration as follows:

Please use the embedded video for a quick reference. For a detailed study on how the OpenIDM works in a cluster, please refer to the ForgeRock documentation.

Enjoy!

Setting Up ForgeRock OpenIDM with MySQL

ForgeRock OpenIDM comes bundled with OrientDB. But the use of OrientDB as an internal repository for OpenIDM is not recommended in a production environment. A list of supported JDBC repositories for production use with OpenIDM can be found here. In this post, you’ll find a screen-cast that demonstrates the configuration of MySQL as an internal repository for OpenIDM. The following video log, however, does not demonstrate the installation of OpenIDM, but if interested you can watch the OpenIDM installation here.

The following screen-cast is based on the ForgeRock OpenIDM documentation section

Solaris & MySQL Courses

In the last few weeks, I had the opportunity to take a couple of customized courses on Solaris & MySQL. Here, meet my friends:


A customized four day program on Transition to Solaris 11 based on Solaris 11.2 from 09/Jun – 12/Jun 2015 in Bangalore


A five day program on Solaris 11 Network Administration at Hyderabad during the last week of May 2015.


A five day customized program on MySQL for Database Administrators & MySQL for Developers at a client location in Bangalore from May 11 – 15 2015.

For details around the Solaris certification, click here. For information on MySQL certification, go here.

Some Quick Updates

That I’ve been busy is an understatement. In the last four weeks or so, managed to do programs on technologies ranging from Operating platform to Database to Engineered Systems. In the process I met up with the following folks:


MySQL Training in Noida.


Exadata Training in Singapore.


Solaris 11 Training program at Chennai.

In addition, I had connected with many others, but don’t have their ‘faces’ to show coz I met them on WebEx.

Last Fortnight…

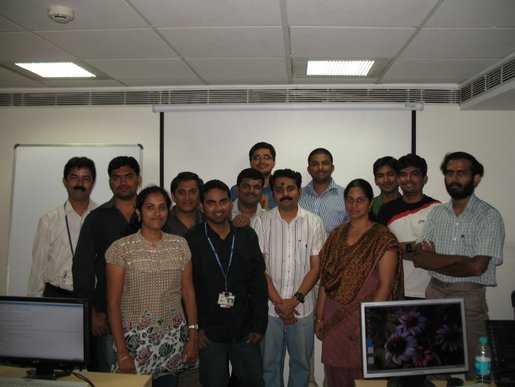
In the last fortnight, I had an opportunity to meet up with some very energetic folks, who actively participated in a couple of OU programs on Solaris 11 and MySQL. I thank them for their participation and hope all of ’em had a good learning experience showing up for Oracle University programs.

As always, I’m publishing below a moment from each of the aforesaid programs.


MySQL DBA session in Bangalore.
It’s unfair if I don’t express my heartfelt thanks to each of ’em for a serious teach back session through out the training program and I wish to do so by publishing moments from each one’s teach back assignment:

Below is a class photograph from Solaris 11 Administration Session in Bangalore.

Configuring Multiple Instances of MySQL in Solaris 11

Recently someone asked me for steps to configure multiple instances of MySQL database in an Operating Platform. Coz of my familiarity with Solaris OE, I prepared some notes on configuring multiple instances of MySQL database on Solaris 11. Maybe it’s useful for some:

If you want to run Solaris Operating System (or any other OS of your choice) as a virtualized instance in desktop, consider using Virtual Box.
To download Solaris Operating System, click here.

Once you have your Solaris Operating System (Version 11) up and running and have Internet connectivity to gain access to the Image Packaging System (IPS), please follow the steps as mentioned below to install MySQL and configure multiple instances:

1. Install MySQL Database in Solaris 11
$ sudo pkg install mysql-51
2. Verify if the mysql is installed:
$ svcs -a | grep mysql
Note: Service FMRI will look similar to the one here: svc:/application/database/mysql:version_51
3. Prepare data file system for MySQL Instance 1
zfs create rpool/mysql
zfs create rpool/mysql/data
zfs set mountpoint=/mysql/data rpool/mysql/data
4. Prepare data file system for MySQL Instance 2
zfs create rpool/mysql/data2
zfs set mountpoint=/mysql/data rpool/mysql/data2
5. Change the mysql/datadir of the MySQL Service (SMF) to point to /mysql/data
$ svcprop mysql:version_51 | grep mysql/data
$ svccfg -s mysql:version_51 setprop mysql/data=/mysql/data
6. Create a new instance of MySQL 5.1
(a) Copy the manifest of the default instance to temporary directory:
$ sudo cp /lib/svc/manifest/application/database/mysql_51.xml /var/tmp/mysql_51_2.xml
(b) Make appropriate modifications on the XML file
$ sudo vi /var/tmp/mysql_51_2.xml
-> Change the “instance name” section to a new value “version_51_2”
-> Change the value of property name “data” to point to the ZFS file system “/mysql/data2”
7. Import the manifest to the SMF repository:
$ sudo svccfg import /var/tmp/mysql_51_2.xml
8. Before starting the service, copy the file /etc/mysql/my.cnf to the data directories /mysql/data & /mysql/data2.
$ sudo cp /etc/mysql/my.cnf /mysql/data/
$ sudo cp /etc/mysql/my.cnf /mysql/data2/
9. Make modifications to the my.cnf in each of the data directories as required:
$ sudo vi /mysql/data/my.cnf
Under the [client] section
port=3306
socket=/tmp/mysql.sock
—-
—-
Under the [mysqld] section
port=3306
socket=/tmp/mysql.sock
datadir=/mysql/data
—–
—–
server-id=1
$ sudo vi /mysql/data2/my.cnf
Under the [client] section
port=3307
socket=/tmp/mysql2.sock
—–
—–
Under the [mysqld] section
port=3307
socket=/tmp/mysql2.sock
datadir=/mysql/data2
—–
—–
server-id=2
10. Make appropriate modification to the startup script of MySQL (managed by SMF) to point to the appropriate my.cnf for each instance:
$ sudo vi /lib/svc/method/mysql_51
Note: Search for all occurences of mysqld_safe command and modify it to include the –defaults-file option. An example entry would look as follows:
${MySQLBIN}/mysqld_safe –defaults-file=${MYSQLDATA}/my.cnf –user=mysql –datadir=${MYSQLDATA} –pid=file=${PIDFILE}
11. Start the service:
$ sudo svcadm enable mysql:version_51_2
$ sudo svcadm enable mysql:version_51
12. Verify that the two services are running by using:
$ svcs mysql
13. Verify the processes:
$ ps -ef | grep mysqld
14. Connect to each mysqld instance and verify:
$ mysql –defaults-file=/mysql/data/my.cnf -u root -p
$ mysql –defaults-file=/mysql/data2/my.cnf -u root -p

Some references for Solaris 11 newbies
Taking your first steps with Solaris 11
Introducing the basics of Image Packaging System
Service Management Facility How To Guide

For a detailed list of official educational modules available on Solaris 11, please visit here
For MySQL courses from Oracle University access this page.

Friends from Yahoo who showed up for an OU program around MySQL.


If there are people out there, who’d wish to know what OU has in offer for professionals well versed in MySQL Database Administration, please refer to the MySQL Performance Tuning and MySQL Cluster course description and schedule.

And for those interested to validate their skill on MySQL DBA, I recommend MySQL DBA Certification exam. Believe me, taming sakila is an experience in itself.