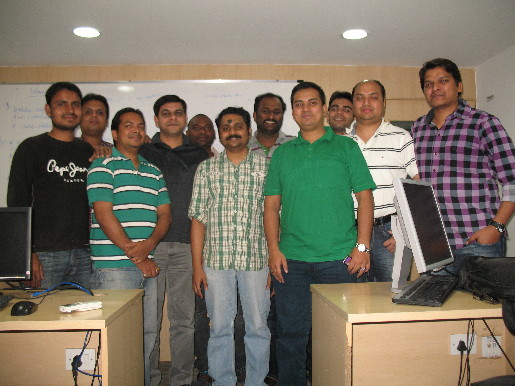
Concluded another ‘Transition to Solaris 11‘ program in Hyderabad this evening. Here’s the batch photograph:

Concluded another ‘Transition to Solaris 11‘ program in Hyderabad this evening. Here’s the batch photograph:
Meet my colleagues who showed up for an OU course on Solaris 11 Advanced Administration at our office in Bangalore.

My last week’s engagement on OU programs around Solaris 11 zones and Solaris 11 ZFS at Hyderabad concluded on Saturday. Thanks to each of the training delegates in the picture below for active participation and co-operation during the program.

Last but not least, heart felt gratitude to them for throwing a surprise advance birthday bash!

With a number of networking features introduced and enhanced in the Solaris 11.2 release, it was quite an engaging session last week on ‘Transition to Solaris 11’.
![]()
Find more details about Solaris 11 here.
Before I forget, let me mention here that those who take up Instructor Led Training Programs or Live Virtual Classes from Oracle University is eligible for a free trail on Oracle Learning Streams. Details about it can be found here
Concluded a training program on ‘Transition to Solaris 11’ at Hyderabad just this last week.

Visit Solaris home page here
Just this Friday, I concluded a 12 day continous program for two batches from one of the Oracle Customers on two different Oracle University Courses around Solaris 11 and Oracle VM for SPARC.

Batch I: 08 – 13 December 2014

Batch II : 14 – 19 December 2014
If you are interested in the details of course that they attended from 08 Dec to 19 Dec 2014, you can find it here and here.
Just last week I completed yet another Oracle University training program on ‘Transition to Solaris 11‘.

For those who aren’t aware, Solaris 11.2 is generally available since the last week of July 2014 and can be downloaded from here.
For those who are interested in getting some useful information on Network Virtualization feature in Solaris 11, I’d recommend some of the demonstrations prepared by my friends at Solaris Curriculum development team in Oracle:
Managing Network Resources Using Oracle Solaris 11
Configuring a Virtual Network Using Oracle Solaris 11.1 – Part1
Configuring a Virtual Network Using Oracle Solaris 11.1 – Part2
For details around Solaris 11 training programs from Oracle University, go here.
Before it’s too late, let me publish here the class portraits of my last two OU assignments:

Transition to Solaris 11 session at Hyderabad from October 15 – 19 2013

Exadata Install & Maintenance Session at Singapore from September 23 – 27 2013
Just yesterday, one more training program on Oracle Solaris 11 concluded at Hyderabad, India. If you haven’t tried Solaris 11 yet, click here to access the image and a host of other resources to help you get started. For information on training on Solaris 11, please see here. If you’ve already attended a training program or would like to validate your knowledge on Solaris 11, please access this link to get details around the Solaris 11 certification programs. Meanwhile, thanks to my friends for showing up again for an OU training program on Oracle technologies:
Have a restful weekend all.
In the last fortnight, I had an opportunity to meet up with some very energetic folks, who actively participated in a couple of OU programs on Solaris 11 and MySQL. I thank them for their participation and hope all of ’em had a good learning experience showing up for Oracle University programs.
As always, I’m publishing below a moment from each of the aforesaid programs.

MySQL DBA session in Bangalore.
It’s unfair if I don’t express my heartfelt thanks to each of ’em for a serious teach back session through out the training program and I wish to do so by publishing moments from each one’s teach back assignment:
Below is a class photograph from Solaris 11 Administration Session in Bangalore.

Recently someone asked me for steps to configure multiple instances of MySQL database in an Operating Platform. Coz of my familiarity with Solaris OE, I prepared some notes on configuring multiple instances of MySQL database on Solaris 11. Maybe it’s useful for some:
If you want to run Solaris Operating System (or any other OS of your choice) as a virtualized instance in desktop, consider using Virtual Box.
To download Solaris Operating System, click here.
Once you have your Solaris Operating System (Version 11) up and running and have Internet connectivity to gain access to the Image Packaging System (IPS), please follow the steps as mentioned below to install MySQL and configure multiple instances:
1. Install MySQL Database in Solaris 11
$ sudo pkg install mysql-51
2. Verify if the mysql is installed:
$ svcs -a | grep mysql
Note: Service FMRI will look similar to the one here: svc:/application/database/mysql:version_51
3. Prepare data file system for MySQL Instance 1
zfs create rpool/mysql
zfs create rpool/mysql/data
zfs set mountpoint=/mysql/data rpool/mysql/data
4. Prepare data file system for MySQL Instance 2
zfs create rpool/mysql/data2
zfs set mountpoint=/mysql/data rpool/mysql/data2
5. Change the mysql/datadir of the MySQL Service (SMF) to point to /mysql/data
$ svcprop mysql:version_51 | grep mysql/data
$ svccfg -s mysql:version_51 setprop mysql/data=/mysql/data
6. Create a new instance of MySQL 5.1
(a) Copy the manifest of the default instance to temporary directory:
$ sudo cp /lib/svc/manifest/application/database/mysql_51.xml /var/tmp/mysql_51_2.xml
(b) Make appropriate modifications on the XML file
$ sudo vi /var/tmp/mysql_51_2.xml
-> Change the “instance name” section to a new value “version_51_2”
-> Change the value of property name “data” to point to the ZFS file system “/mysql/data2”
7. Import the manifest to the SMF repository:
$ sudo svccfg import /var/tmp/mysql_51_2.xml
8. Before starting the service, copy the file /etc/mysql/my.cnf to the data directories /mysql/data & /mysql/data2.
$ sudo cp /etc/mysql/my.cnf /mysql/data/
$ sudo cp /etc/mysql/my.cnf /mysql/data2/
9. Make modifications to the my.cnf in each of the data directories as required:
$ sudo vi /mysql/data/my.cnf
Under the [client] section
port=3306
socket=/tmp/mysql.sock
—-
—-
Under the [mysqld] section
port=3306
socket=/tmp/mysql.sock
datadir=/mysql/data
—–
—–
server-id=1
$ sudo vi /mysql/data2/my.cnf
Under the [client] section
port=3307
socket=/tmp/mysql2.sock
—–
—–
Under the [mysqld] section
port=3307
socket=/tmp/mysql2.sock
datadir=/mysql/data2
—–
—–
server-id=2
10. Make appropriate modification to the startup script of MySQL (managed by SMF) to point to the appropriate my.cnf for each instance:
$ sudo vi /lib/svc/method/mysql_51
Note: Search for all occurences of mysqld_safe command and modify it to include the –defaults-file option. An example entry would look as follows:
${MySQLBIN}/mysqld_safe –defaults-file=${MYSQLDATA}/my.cnf –user=mysql –datadir=${MYSQLDATA} –pid=file=${PIDFILE}
11. Start the service:
$ sudo svcadm enable mysql:version_51_2
$ sudo svcadm enable mysql:version_51
12. Verify that the two services are running by using:
$ svcs mysql
13. Verify the processes:
$ ps -ef | grep mysqld
14. Connect to each mysqld instance and verify:
$ mysql –defaults-file=/mysql/data/my.cnf -u root -p
$ mysql –defaults-file=/mysql/data2/my.cnf -u root -p
Some references for Solaris 11 newbies
Taking your first steps with Solaris 11
Introducing the basics of Image Packaging System
Service Management Facility How To Guide
For a detailed list of official educational modules available on Solaris 11, please visit here
For MySQL courses from Oracle University access this page.
With just under a fortnight left for the official launch of Oracle Solaris 11, the elite club of OU trained Solaris 11 professionals has grown by a few additional numbers.
![]()
I’ve no doubt that their experience on transitioning to Solaris 11 have been enriching. So don’t wait anymore, come join the Solaris 11 Club!
Well, if you aren’t convinced on hearing this from an insignificant soul like me, I recommend you go here and register for the Oracle Solaris Launch webcast on November 09 2011, Wednesday (9:00 a.m. – 1:30 p.m. ET) and hear it straight from the people who matter. Again, don’t miss this historic event. Register NOW!.